Here is an example Arduino Nano LCD code for a beginner:
#include   // include the LCD library

LiquidCrystal lcd(7, 8, 9, 10, 11, 12); // initialize the library with the LCD pins

void setup() {
  lcd.begin(16, 2); // set the LCD to 16x2
  lcd.print("Hello, World!"); // print "Hello, World!" on the LCD
}

void loop() {
  lcd.setCursor(0, 1); // set the cursor to the second row
  lcd.print(millis()/1000); // print the number of seconds since the Arduino was last reset
}
This code uses the LiquidCrystal library to communicate with the LCD. The library is included at the top of the code with the line #include . The library is then initialized with the pins that the LCD is connected to, in this example it is connected to the digital pins 7, 8, 9, 10, 11, and 12.
The setup() function is run only once at the beginning of the program. In this example, the LCD is set to a 16×2 display and the message “Hello, World!” is printed on the LCD.
The loop() function is run repeatedly, in this example the cursor is set to the second row and the number of seconds since the Arduino was last reset is printed on the LCD.
This is a simple example to display a message on the LCD and it can be expanded by adding more functionality and complexity to it.
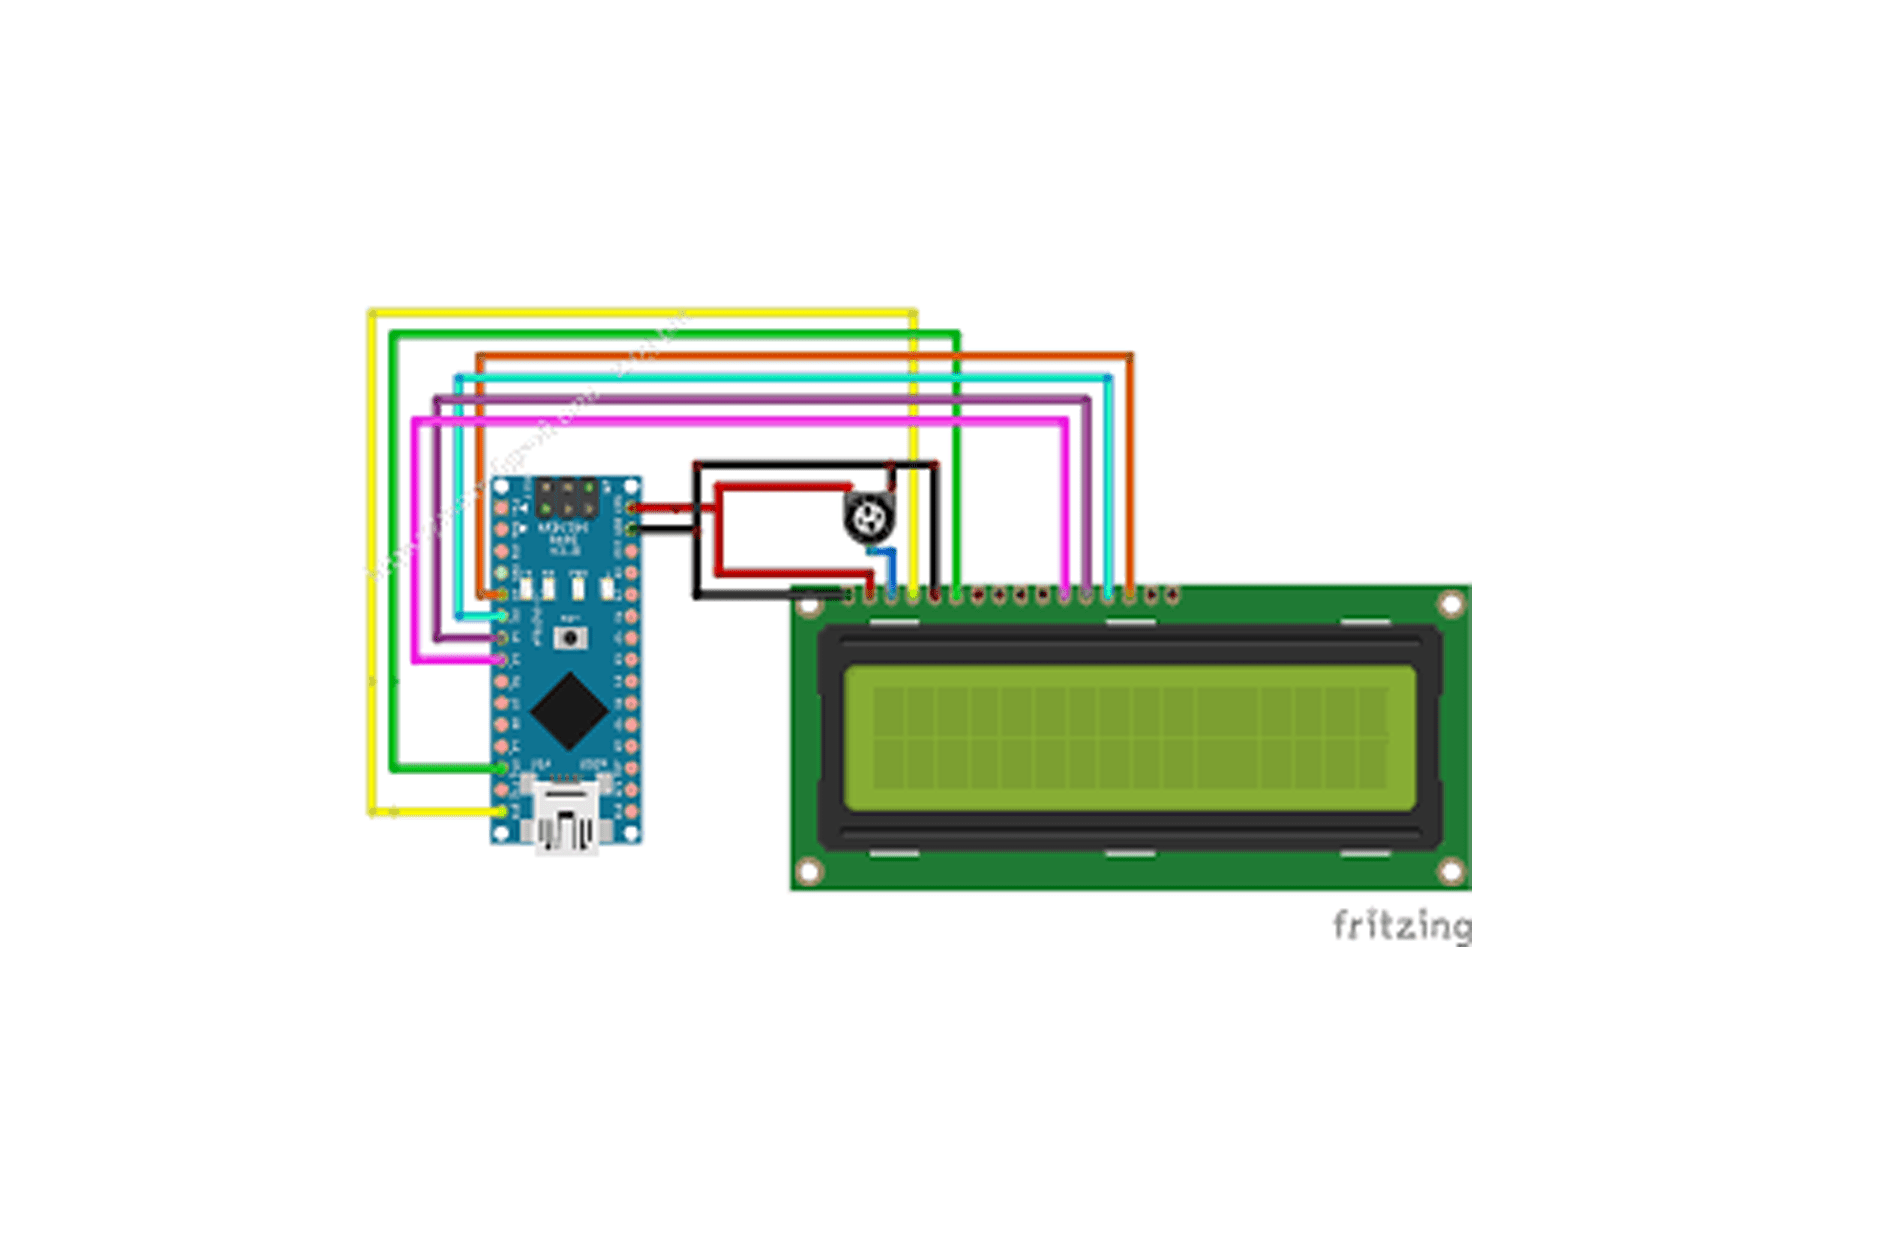
It’s important to note that in order to use this code, you will need to have an LCD and an Arduino Nano board, and connect the LCD to the Arduino Nano following the pinout diagram of the LCD and the Arduino Nano Board.